KPovModeler 0.2
Written by Olivier Saraja (olivier_at_linuxgraphic.org)
English version
Case 4: The Area Light
From now on, all lights originated from a single point, so the shadows' borders were very sharp. But direct observation of our surrounding generally uncovers predominance of very soft shadows, with fuzzy borders. This is mostly the case outdoor, but also when the sun is shining through a window, or when the light is radiating from your computer screen.
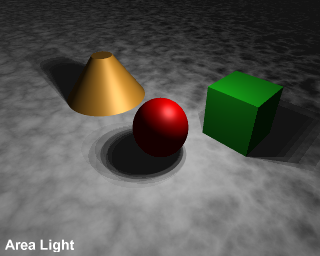
In fact, these soft shadows are cast because of light originating from areas rather than points. The sky, a window, a TV screen could reasonably more or less be considered as wide areas. A candle, a bulb or a lamp shouldn't. This also hints to what kind of light you should use for better accuracy or believability.
If you check Area Lights in the Light dialog window, you can expect softer shadows (and longer rendering times!), but you also discover many new parameters to play with. You should also note that these are faked area lights, and that general luminosity of the scene is kept constant, weither this option is checked or not.
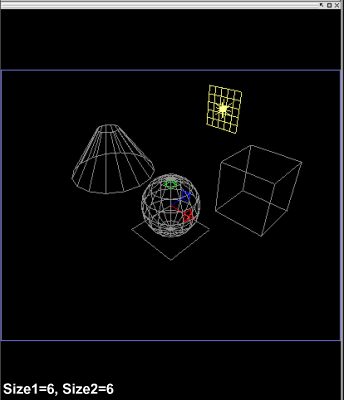
In fact, area lights are faked using the following trick: a grid is defined, and at each point of the grid is set a sub-light the same type as defined before Area light option was turned on. Because of this trick and the tightness of the grid, area lights generally work better from a minimal distance (to be sure of this, try the example scene with Location x = 1, y = 3 and z = 1, and then with x = 10, y = 30 and z = 10 to see softer shadows cast by the same objects or Light system).
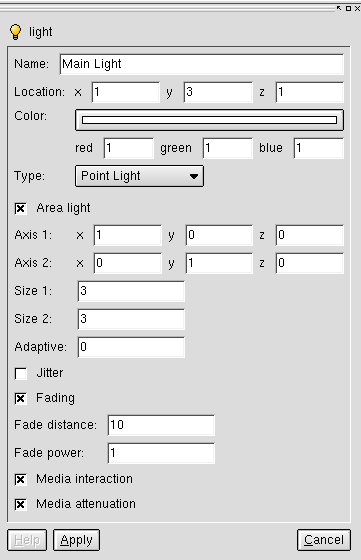
Axis 1, Axis 2: as for all planes, two vectors are enough to define the grid. Here you can specify the coordinates of each vector, but you can also rotate the grid in any graphic view. Most of time, the plane should be set vertically when simulating light originating from a TV screen or a window, or horizontally when simulating the skylight. Values greater than 1.0 implies a wider emitting area.
Size 1, Size 2: there you define the number of subdivision of the grid in the two local directions of the grid defined previously by the two Axis . Of course, the higher you set these values, the more sub-lights will be used in the rendering calculations, with two immediate consequences: softer shadows, longer rendering times. It's your choice to decide between realism and rendering times, but don't let technical considerations impair your artistic creativity: in most cases, it could be a good idea to work with a single Point light , for example, and to activate the Area Light option (with higher values of Size ) at the very final rendering of your scene.


Adaptive: this is work around to enable quicker calculations, but it results in approximated shadows. The lowest the value, the quicker the calculation but the less accurate the shadow cast. The higher the value, the longer the calculation but the more accurate the shadow cast. Starting with a value of 1 is always a good base, you can increase the value until the effect is visually good. If time isn't a matter or if you have a computer with a « strong » CPU, then you can set immediately this value to 5 or more if you want.
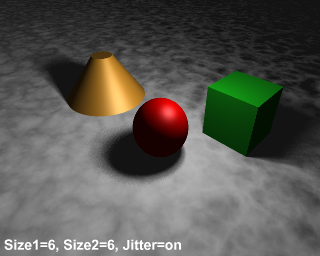
Jitter: light sources are set according the grid subdvisions, but these are too regular to seem natural in most cases. Activating Jitter adds some randomness at the exact location of each sub-light of the area light. Because of the randomness, you will never get the exactly the same shadow casting from a render to another.


Of course, due to the scattering of the shadows while Jitter is on, this option works betters with higher values of Size1 and Size2, as shown on the following example: